My First Binary Analysis
This is my first binary analysis, as a first exercise of Reverse Engineering subject from university.
To preserve the experience of my first reverse engineering analysis I didn’t run the program because as I imagined, it is very simple an does not have any complexity or complicated functions or data manipulation. I also tried to read the entire assembly before doing some research to try to identify what it was doing, even though I did not understand most of the instructions at first
For our analysis we will be using and open source tool developed by NSA called Ghidra.
The main objectives are
- Execute automatic analisys
- Identify binary architecture
- Identify main function
- Identify internal functions
- Identify relevant strings
Before we begin analysing
Right after we create a new project and import our executable, we need to set some initial settings so we can tell Ghidra how the executable should be loaded and interpreted before we can begin the analysis.
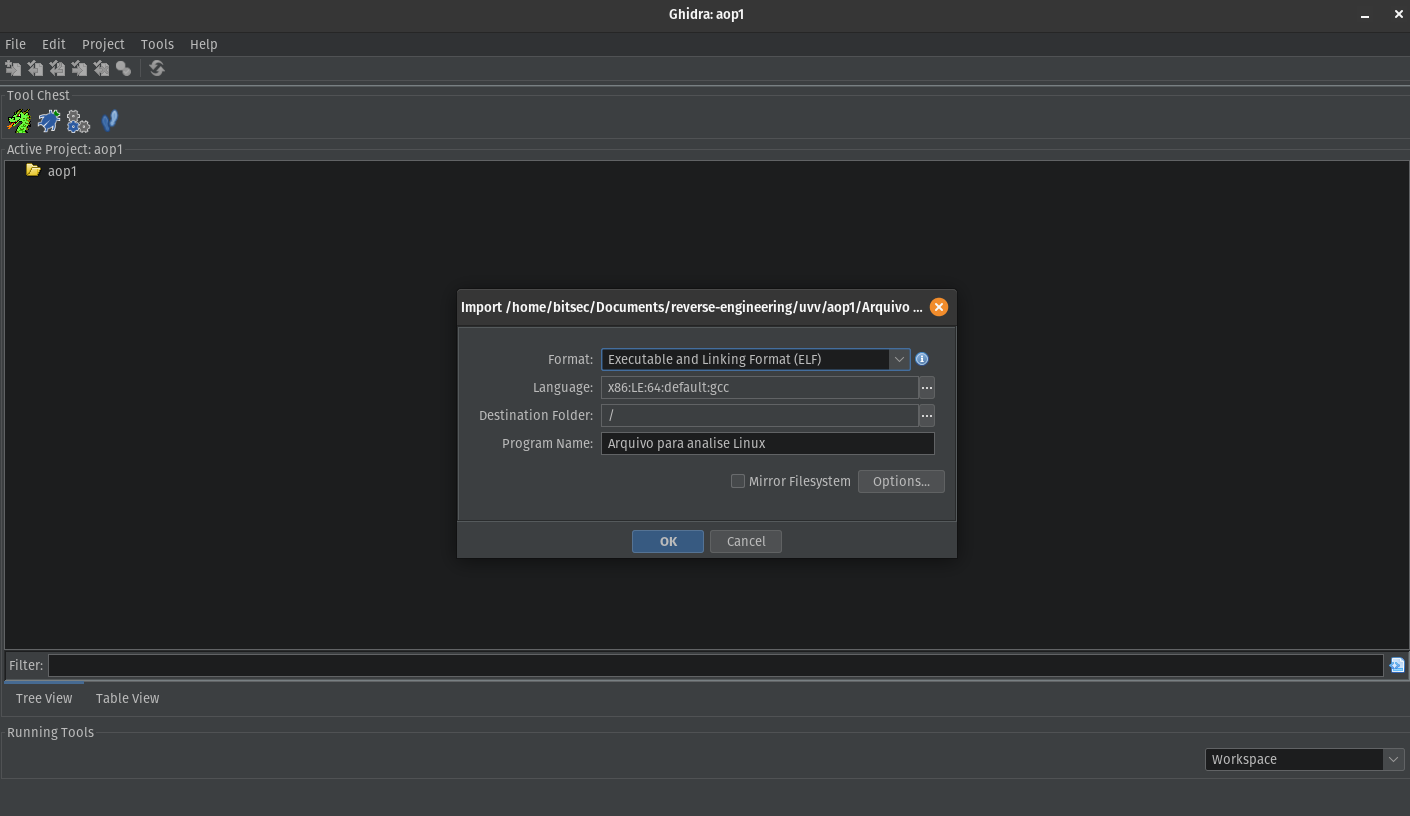
Format and architecture initial configuration.
Ghidra use these information to know how to read headers, load sections and locate functions and symbols.
This will generate a import results summary, and here we can already see some important information about our binary:
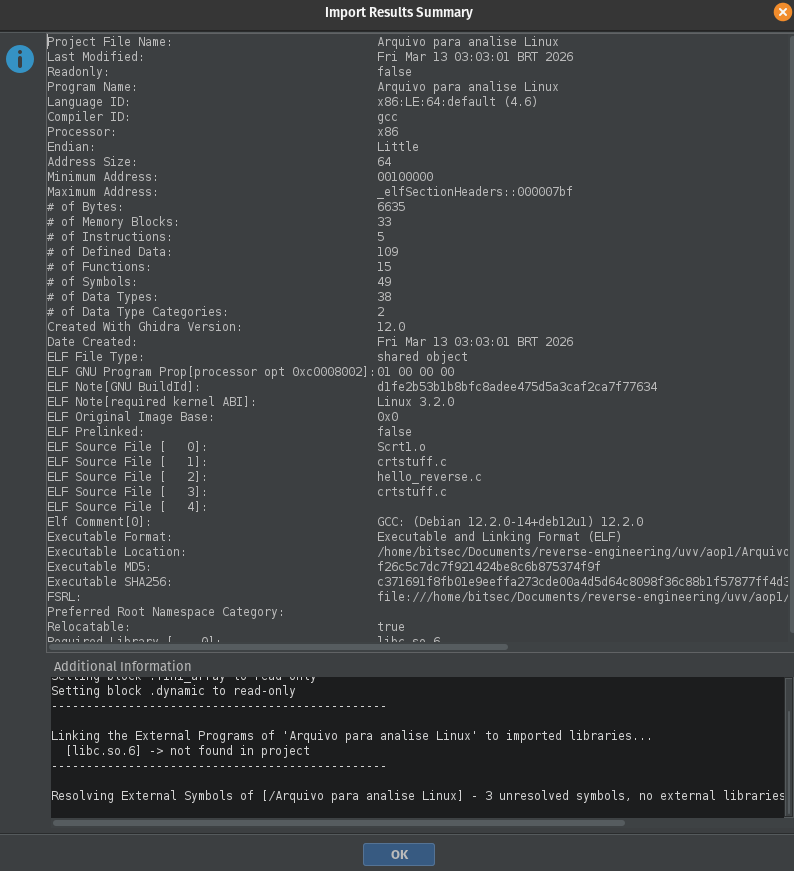
Import Results Summary.
- Language ID: x86:LE:64:default
- Processor: x86
- Endian: little
- Address Size: 64
- Compiler ID: gcc
- Executable Format: ELF
It defines:
- Registers being used
- Instructions format
- Pointers size
- ELF (Executable and Linkable Format, the standard executable format used on Linux systems.)
- Utilized Compiler (gcc suggest that the code was probably written in C or C++)
And other useful information like:
- ELF Note [required kernel ABI]: Linux 3.2.0
Indicating that the program was compiled to run on Linux systems >= 3.2
- ELF Source File
Appears when the binary is compiled without stripping metadata. It reveals that the code was originally called ‘hello_reverse.c’ and it can give us some hints about its functioning.
Diving into the code
After our import summary, we can double click our executable to load the automatic analysis, where we can already see our main function.
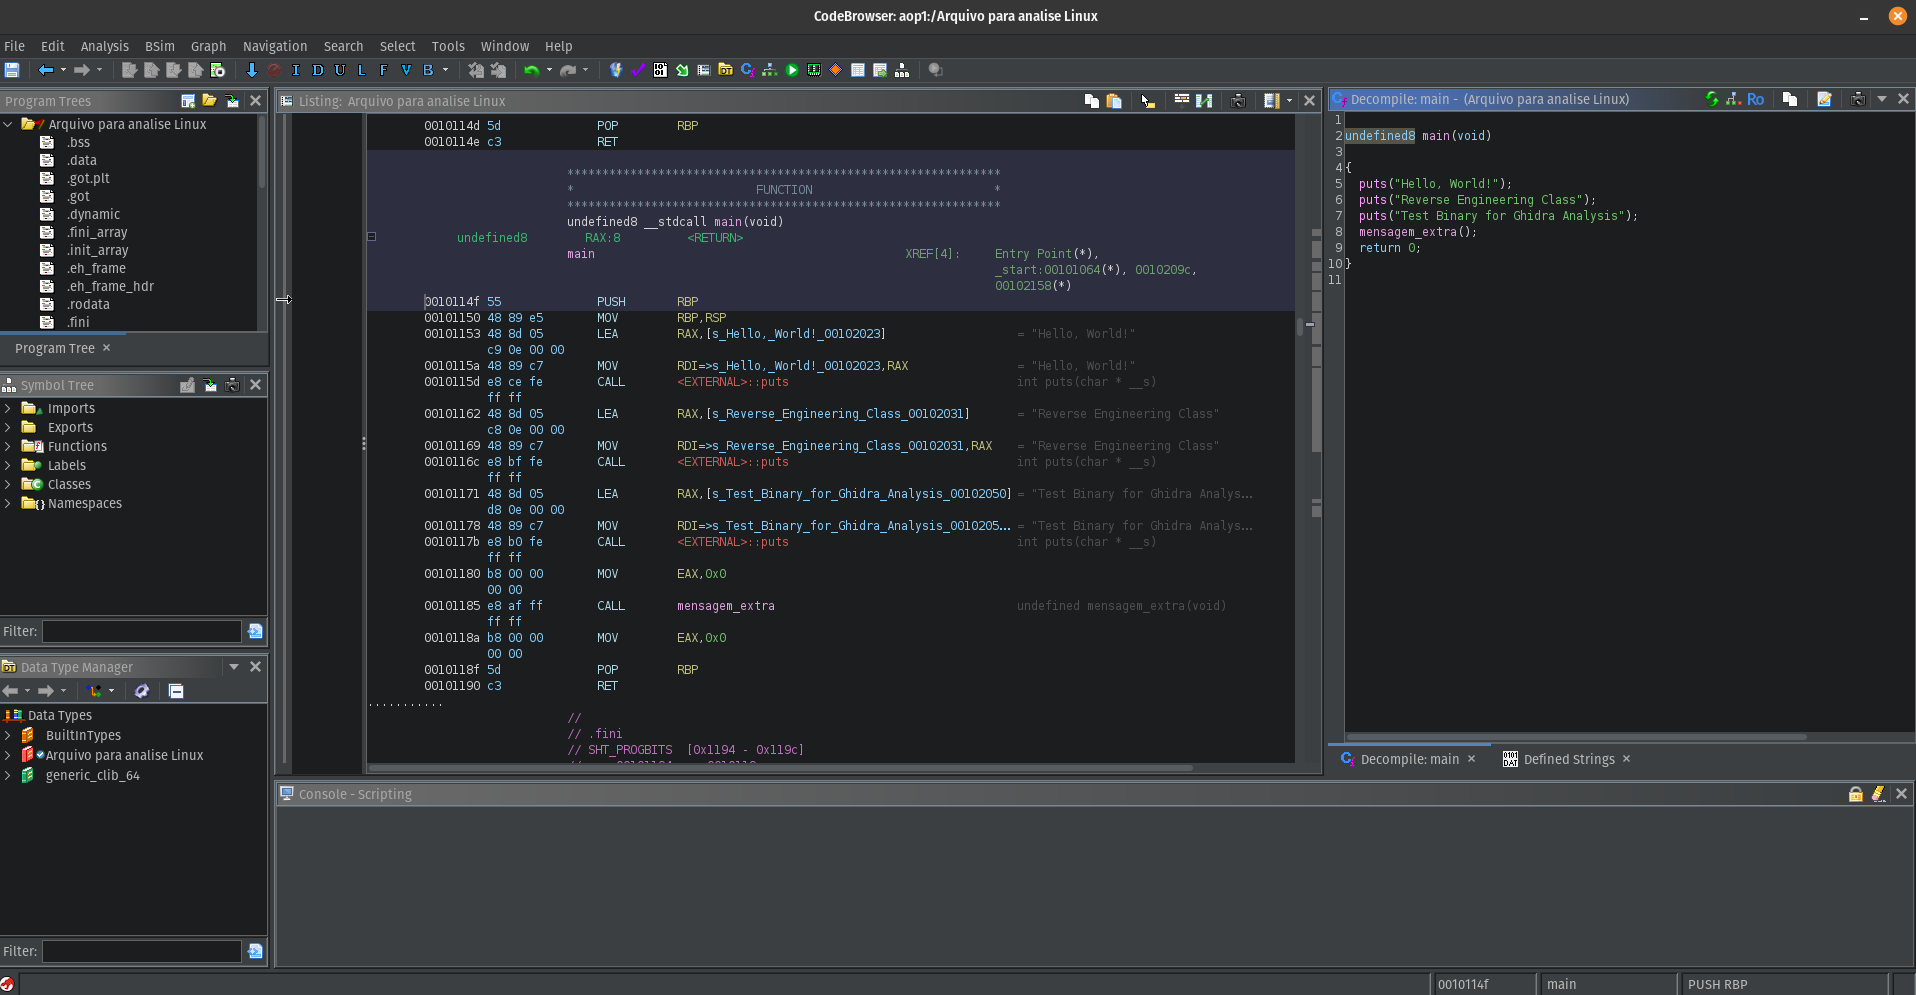
Auto analysis view.
Right beside our machine code, we can see a preview of how C code would look like. And just by looking at the assembly, with some programming background we can already understand what the program does even without knowing every instruction, but also is where the fun begins.
Looking at the assembly code, we can already identify some of the most common instructions used by the program.
In the main function, the main assembly instructions used are MOV, LEA, and CALL.
MOV – Used to copy a value from one place to another. Unlike what the name suggests, the value is only ‘copied’ and not ‘moved’ from one place to another.
LEA– Used to load the address of something. It only obtains the memory address of a variable and not its value.
CALL – Used to call a function. In the context of the example, CALL is used several times to execute the puts function from libc, which prints the string and automatically includes a newline at the end of that string. At the end, the instruction also executes the mensagem_extra() function.
By doing some research, we can also understand that there is an execution flow before our program hit the main function.
Execution begins at the _start entry point provided by the compiler runtime:
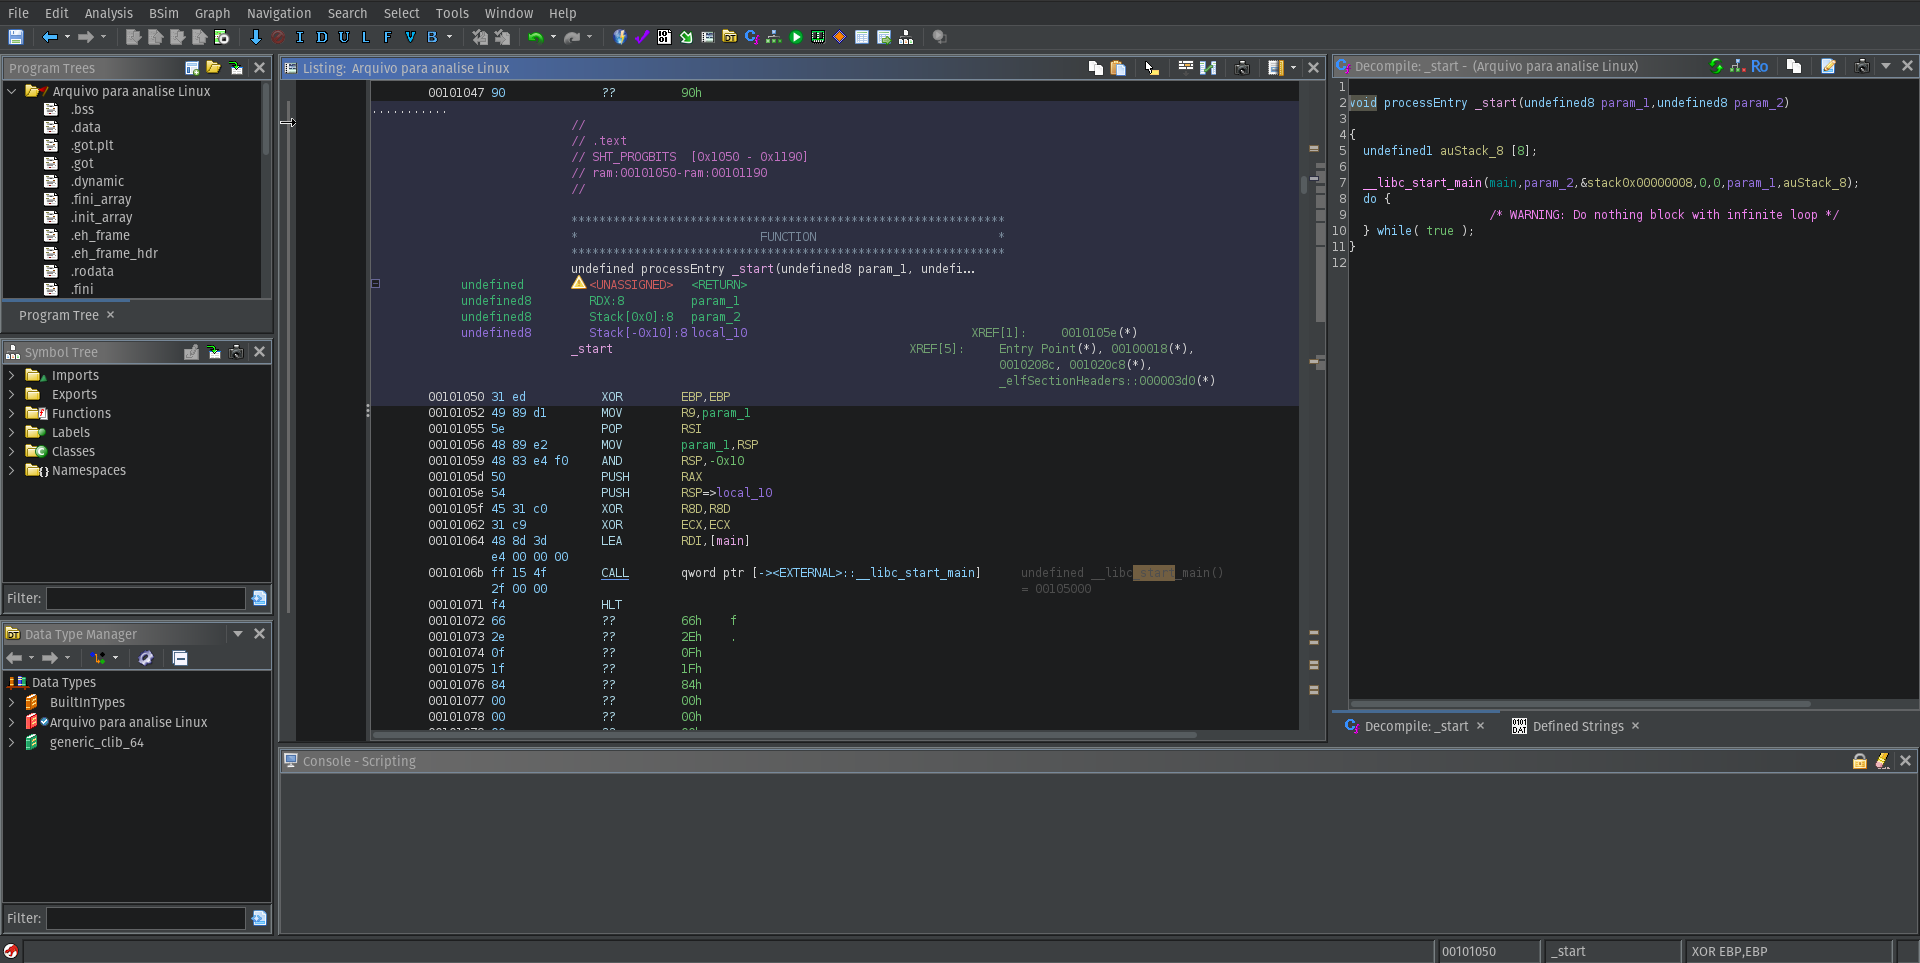
_start function.
- Prepare the arguments (
argc,argv) - Prepare environmental variables
- Configure stack
- Call libc (Call the C standard library)
And after that, it calls __libc_start_main :
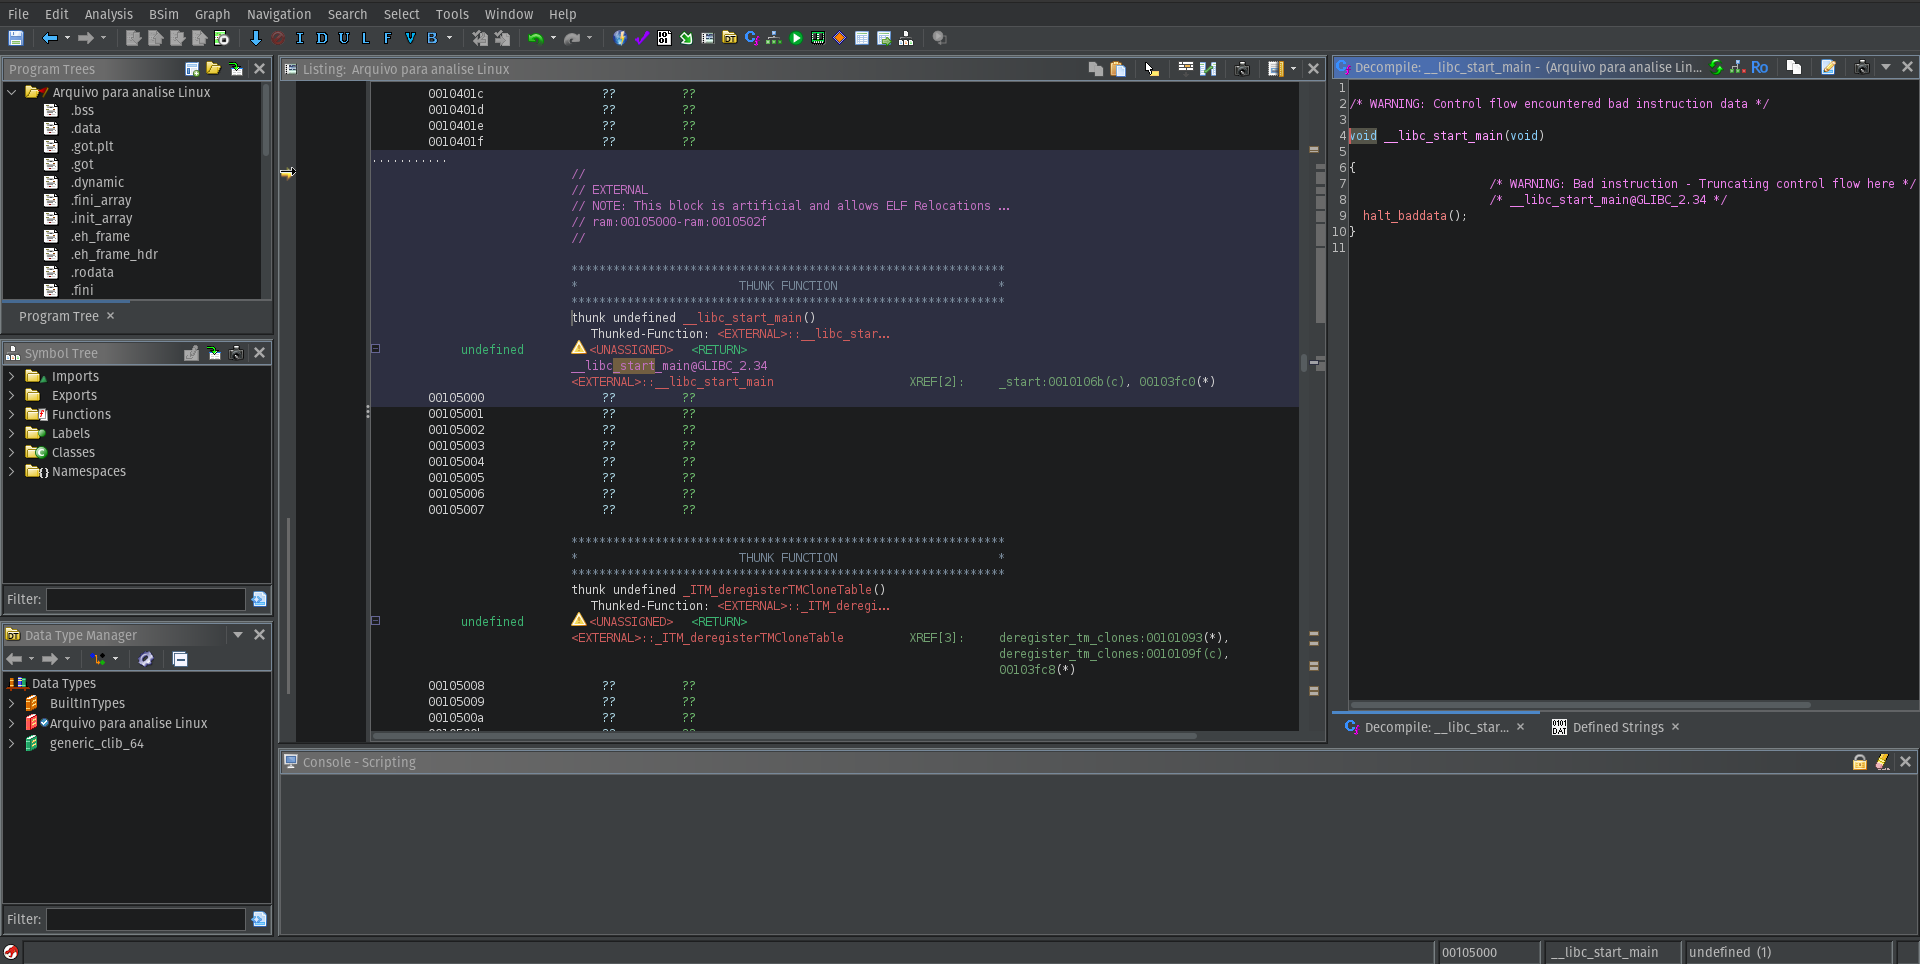
__libc_start_main function.
- Initialize the C runtime environment
- Register finalization functions (
atexit) - Call
main
It receives our main as one of the arguments __libc_start_main(main, argc, argv, ...), we cannot see it because it belongs to an external library.
After our mainfinishes, the control return to __libc_start_main, and it calls exit() to end the program.
To finish our analysis, if we look at the mainfunction, we can see that it also calls a functions named mensagem_extra() by having a look inside of it, we can see the same pattern with the instructions to print a new message.
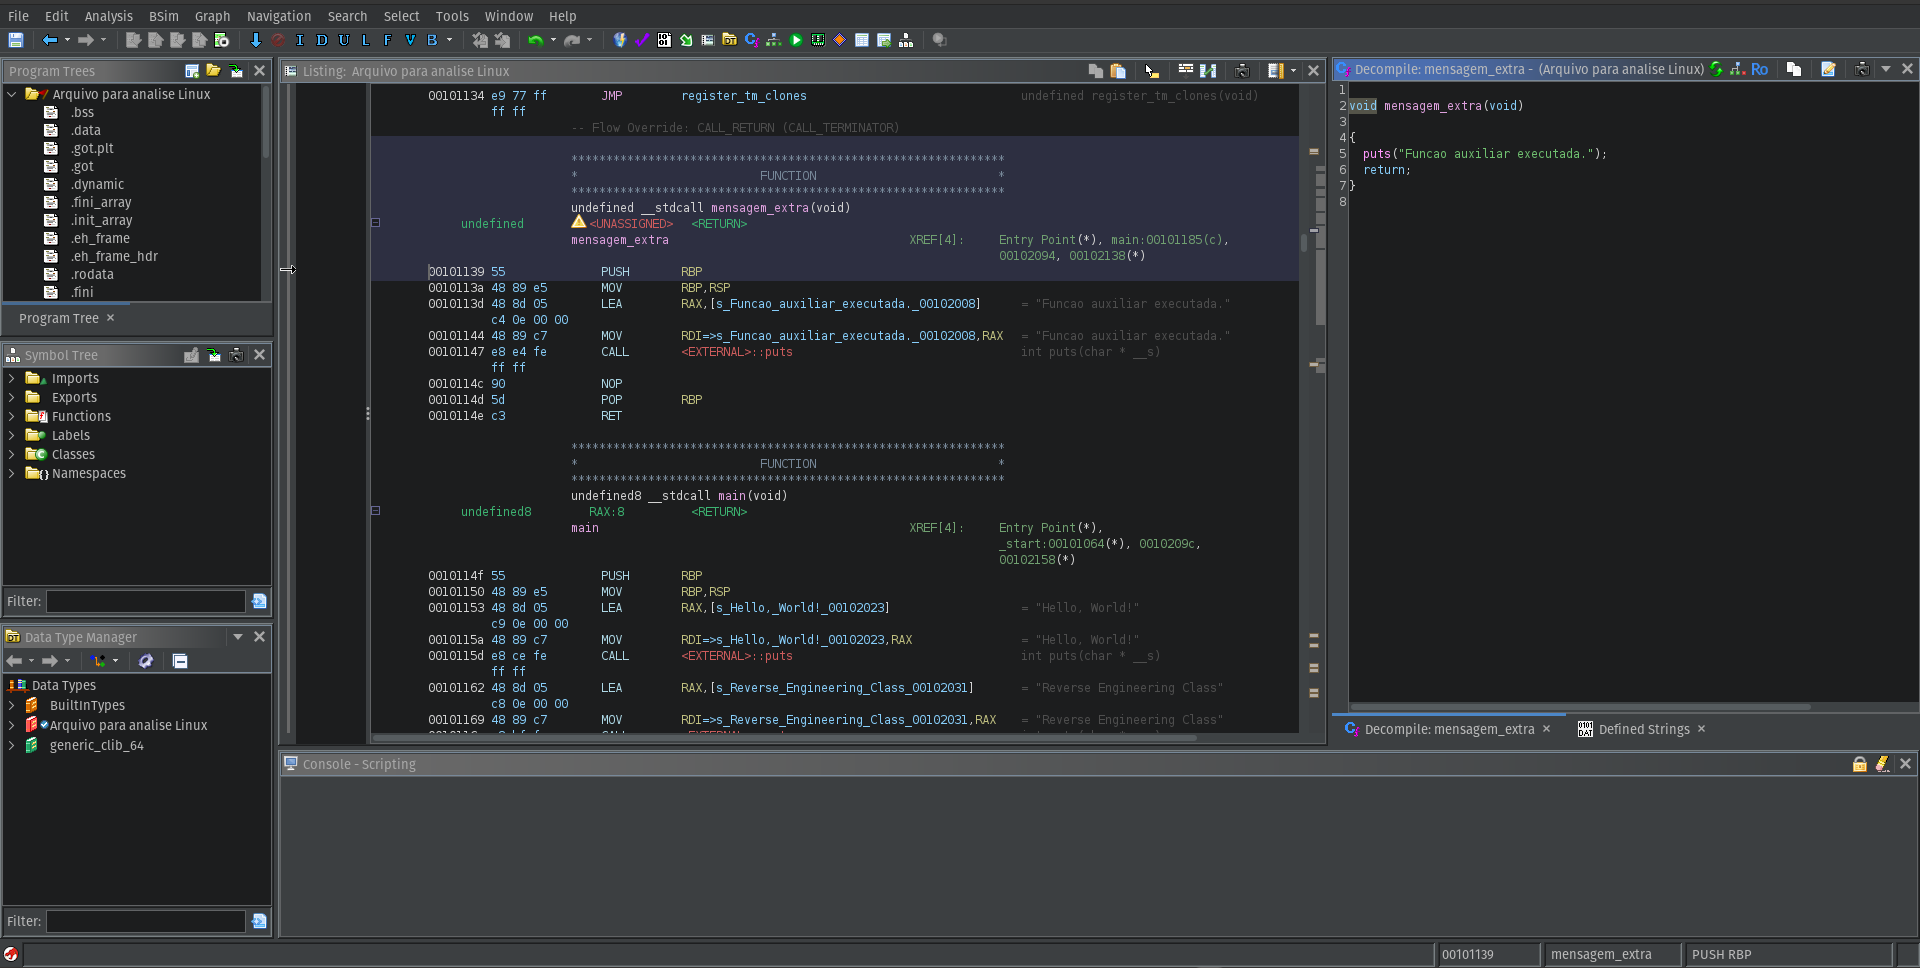
Additional function being called in main
After printing the last message, it just return to our main function and the program finishes.
Conclusion
Although the binary analyzed in this exercise is very simple, the goal was not complexity but understanding the basic workflow of reverse engineering.
By using Ghidra we were able to:
- Inspect the binary format
- Identify its architecture and compiler
- Understand the program execution flow
- Locate the
mainfunction - Analyze how the program interacts with the C standard library
Even a simple program can be useful for learning how binaries are structured and how the execution flow works before reaching the main function.
This first exercise helped me become more comfortable navigating assembly instructions and using Ghidra’s analysis tools.
In future posts I plan to explore more complex binaries and dive deeper into other topics.